Sunday, May 20, 2018

Faux Potted Lemon Trees

Summer is almost here (in Texas, it's already here) and I felt it was time to put away my pastel blossoms and bird decorations and go with a more summer theme. The issue for me is I am not a huge fan of summer decor. I do like my red, white, and blue around Memorial Day and 4th of July, but other than that...nothing really grabs me. I am not into beachy, nautical themes, I don't like bright colors, and when I'm all sweaty and irritable by mid July, I don't like "too much visual stimuli." So...what to do?

Last year I did something radical. I embraced a difficult color for me, yellow. I saw all these summery, lemon-centered decor pictures, and you know what? I didn't hate it...I actually really liked it. It was of course seasonally appropriate, and it was organic and simple. So, I got myself some lemons.

Centerpiece on kitchen table, Summer 2017


This year, I decided to take it a bit further...lemon trees.

I love my faux potted olive trees I made a while ago, and I was a bit bummed about putting them away (their color didn't seem fitting for summer) so, why not do my DIY project all over again, this time adding lemons.

Project items assembled.


All pieces from Hobby Lobby. 2 ceramic pots, river stone vase filler, brown floral stem tape, 2 sprigs of green tree leaves, 2 wooden dowels, 2 floral foam discs, and a bag of small faux lemons. Total: $38 for all supplies.

I disassembled the leaves and attached them to the wooden dowels, cut to desired size. I wrapped the leaves in floral stem tape and continued to cover the rest of the dowel. I placed the leaved dowel in the floral foam, already hot-glued into the pot, and I filled with rocks. I attached lemons with floral wire (already on-hand) and covered with floral tape. I secured the rocks in the pot with clear-drying glue.

Taller lemon tree

Smaller lemon tree

The pair side by side

I took down the previously placed olive trees and replaced them with my new lemon trees.

Family room fireplace mantle


I'm going to be honest, it's a lot of yellow for me. Maybe it's just the transition from a muted mantlescape, but I'm getting used to that bright color up there. I do very much enjoy them, and I'm so pleased with how they turned out. Each tree comes out to about $19 a piece.

In a few days I will add some patriotic flare for Memorial Day and then add again for 4th of July. I think this set up will work nicely for this year's summer months!


M.LEWIS


Friday, May 11, 2018

Exposed Brick Wall (part 2)

As I mentioned in my previous post, I needed to order more of the brick wallpaper to finish my dining room project. I received the second order of wallpaper and finished the wall in the dining room with much leftover. I had an idea of where to put it, and tonight, I found a bit of time to squeeze in the application.

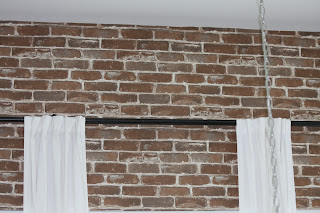
The atrium area above my front door was my chosen place, and I think it turned out quite well.

Here is what the atrium looked like a about a month ago:


I got the lights changed out a few weeks ago, and now the wall:


I finished right as the sun went down, so tomorrow I plan to take more pictures in daylight. However, right now, I am very pleased!


M.LEWIS

Monday, May 7, 2018

Exposed Brick Wall

I have been planning and brainstorming different ways to add character and charm into my house. It's been a few years and my kids are getting older, so I am able to find these pockets of time to design and execute my ideas.
My latest project is finding the perfect place for an exposed brick wall. I have always loved them and have wanted one...but where?

My dining room was lacking in personality and texture, so I decided that was a good room for my idea. I wanted to make the process swift and without a lot of money and material. Enter: wallpaper. I know, I know...wallpaper? Really? But yes, it's totally worth it. I recommend using heavy tape and straight pins to hang until you know you really love the look.

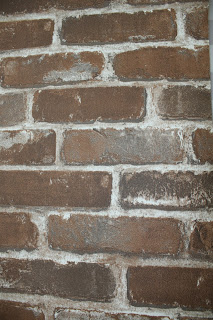
I ordered a 3D, textured wallpaper in my preferred brick color. You can order what I picked HERE. It's listed as "brown" but it is really a mix of brown and gray.


The results are amazing! I am so pleased with how the room turned out...I still have to finish up the bottom of the wall, but I ran out of wallpaper. An order for more wallpaper was placed tonight, by the end of the week it should be complete. I will have a lot left over, so I am already planning on putting just a bit more up in another place.

BEFORE:::


AFTER:::


Total for this project: $68 (with lots of wallpaper to spare)


M.LEWIS