Friday, November 18, 2022

Christmas Mantel Piece-Together


Many of you have asked me where you can get the same items I use in my decor, especially with the mantel. I decided that the best way to share this info is by posting blogs focusing on certain areas with links. Now, some items are from years ago, some items I made, but for those items, I did look around and found some very good replacements that will overall give you the same look and feel as my own.

Each item will be listed with a link. Obviously, if you were to replicate the mantel exactly, you will need to spend some money. Hopefully you can look around at what you already own, and make some adjustments to save some cash. I spent years collecting these items, and shopping around on clearance sales after season...it takes time and energy...but with this blog, hopefully I can save you some work and you can find what you want fast, easy, and not so hard on your wallet.


Vintage Print (18x24)
https://www.amazon.com/Connoisseur-Approach-Christmas-Poster-Pollard/dp/B07GX7V245/ref=asc_df_B07GX7V245/?tag=hyprod-20&linkCode=df0&hvadid=475740339559&hvpos=&hvnetw=g&hvrand=5323598164212933549&hvpone=&hvptwo=&hvqmt=&hvdev=c&hvdvcmdl=&hvlocint=&hvlocphy=9026832&hvtargid=pla-1013370689262&psc=1


Originally I bought this print on closeout a few years ago. It came framed, but the original piece is no longer available, so I linked an 18x24 print. You will have to buy a frame, and I linked one toward the end of this list. This print is a foundation piece to the mantel.


Hymn Print (18x24)
https://www.etsy.com/listing/997226521/oh-holy-night-vintage-hymn-wall-art?ref=yr_purchases


This print is the exact link to the one I ordered. I have an 18x24 print. I also bought a poster frame, again, listed below.


Window Frame
https://smile.amazon.com/Ka-Home-Farmhouse-Window-Decor/dp/B096J7QK53/ref=sr_1_3_sspa?crid=3O974PEOK8W2J&keywords=window+wall+frame&qid=1668801916&sprefix=window+wall+fram%2Caps%2C234&sr=8-3-spons&ufe=app_do%3Aamzn1.fos.18ed3cb5-28d5-4975-8bc7-93deae8f9840&sp_csd=d2lkZ2V0TmFtZT1zcF9hdGY&psc=1


This is a link of a look-alike. My window frame, I made. But this one looks very similar. I would double cxheck the dimensions and compare it to the space above your own mantel. For reference, my frame is 28x38. This link is a 24x36, so it's fairly close.

Antique Bells
https://smile.amazon.com/Deco-79-26718-3-Piece-Animal/dp/B007YS6UAA/ref=sr_1_5?crid=SSSLP5H73UK3&keywords=antique+brass+bells&qid=1668802391&sprefix=antique+brass+bells%2Caps%2C99&sr=8-5


Not the exact item, but pretty dang close. I used all three on the mantel, and this helps bring in different texture and shine.

Rocking Horse
https://smile.amazon.com/Amandaus-Mediterranean-Sculpture-Decoration-Ornaments/dp/B07W5ZDPPT/ref=pd_bxgy_img_sccl_1/134-2469842-9827752?pd_rd_w=hsHoj&content-id=amzn1.sym.7f0cf323-50c6-49e3-b3f9-63546bb79c92&pf_rd_p=7f0cf323-50c6-49e3-b3f9-63546bb79c92&pf_rd_r=FCPKBHQPK227BWD06S5C&pd_rd_wg=V0QCv&pd_rd_r=9dfb6680-465e-4172-b564-7ca2153aa1bd&pd_rd_i=B07W5ZDPPT&psc=1


This is a close dupe to my rocking horse. I also added a small green wreath around its neck. That's optional...no one probably noticed until I pointed it out.

Mini Christmas Tree
https://www.target.com/p/24-34-unlit-indexed-artificial-christmas-tree-wondershop-8482/-/A-85378471


My exact trees were from Hobby Lobby several years ago. This is a good dupe though, at a really great price. You may want to place it in a can, pot, box, etc...but honestly, the bare base is not bad. You may was to stagger their height with some books or coasters for more variety and interest.

Serving Tray
https://smile.amazon.com/dp/B086C8LS1B/ref=sspa_dk_detail_2?pf_rd_p=88097cb9-5064-44ef-891b-abfacbc1c44b&pf_rd_r=FFZ5HF26XD669402S8HB&pd_rd_wg=at28Q&pd_rd_w=j0ISo&content-id=amzn1.sym.88097cb9-5064-44ef-891b-abfacbc1c44b&pd_rd_r=13d716a2-4b35-48c9-949c-3ab4092b64dd&s=kitchen&sp_csd=d2lkZ2V0TmFtZT1zcF9kZXRhaWw&th=1


Not my exact tray. My tray came from Target many years ago. This is very similar. This can be swapped out with a wicker tray, a wood tray, or even metal. It came be omitted altogether too. I added it for a another layer of texture, but it also hides my outlet on the wall. 

Brass candlesticks
https://smile.amazon.com/Anndason-Candlestick-Holders-Decorative-Anniversary/dp/B08RJDPKBB/ref=sr_1_19?crid=3F91W4CG6PGTW&keywords=antique+brass+candlesticks&qid=1668803215&sprefix=antique+brass+candlesticks%2Caps%2C97&sr=8-19


My candlesticks were actually black. I used Rub'n Buff (antique gold) and turned them into a really nice vintage-looking candlesticks. These are brass, so they may be a bit shinier than my own. You could easily find black candlesticks and use the Rub'n Buff to get a more similar look to my own. The Rub'n Buff is linked at the bottom of this list.

Flameless candles
https://smile.amazon.com/dp/B07YHPRWSF?ref=nb_sb_ss_w_as-reorder-t1_ypp_rep_k0_1_6&amp=&crid=1P611BNUYUZ5U&sprefix=flamel&th=1
or
https://www.lights4fun.com/products/8-truglow-ivory-taper-flameless-candles-with-remote-control


I have used a number of different flameless tapers. Both links are good. One link has 6, the other has 8. I have and use both. I have not noticed a major difference, and I don't have a preference. I recommend both. They take AAA batteries, and do have a timer function.

Draping garland
https://www.target.com/p/northlight-9-x-10-unlit-green-canadian-pine-artificial-christmas-wreath/-/A-76410989#lnk=sametab


Any basic evergreen garland will work. I prefer unlit garlands for greater use opportunities, but prelit garlands would save you a step. I did wire in a few pinecone to the garland, but the look would work just as well without.

Wood Bead garland
https://smile.amazon.com/DECORKEY-Farmhouse-Garland-Tassels-Country/dp/B098JHNW9R/ref=sr_1_8?crid=18YNX6CMRAUMF&keywords=wood%2Bbead%2Bgarland&qid=1668803636&sprefix=wood%2Bbead%2Bgarland%2Caps%2C187&sr=8-8&th=1


Now wood bead garlands are everywhere. Years ago, I made and stained my own. I went with a weathered gray stain, with a bit of early American for warmth. You could stain or paint any wood beads on a garland if they come natural and you want another layer of interest and commitment to the antique vibe.

Ivory ribbon
https://smile.amazon.com/Offray-Berwick-Single-Ribbon-Antique/dp/B00097E94C/ref=sr_1_5?crid=34T4TQNO73TGG&keywords=ivory+ribbon&qid=1668803713&sprefix=ivory+ribbon%2Caps%2C99&sr=8-5


Any ribbon would work...or no ribbon at all if that is your preference. You could also use yarn or rope. I mainly used this to help break up the darkness and the simplicity of the frame garland. It does add a delicate touch to a lot of heavy items too.

Pine/pinecone picks
https://smile.amazon.com/dp/B07FPT5VC9/ref=sspa_dk_detail_4?psc=1&pd_rd_i=B07FPT5VC9&pd_rd_w=oXPXU&content-id=amzn1.sym.88097cb9-5064-44ef-891b-abfacbc1c44b&pf_rd_p=88097cb9-5064-44ef-891b-abfacbc1c44b&pf_rd_r=ZYDCCW21T690J81842MX&pd_rd_wg=CNzMj&pd_rd_r=6ef707fd-7316-43b5-9672-79b5bdbec1bb&s=home-garden&sp_csd=d2lkZ2V0TmFtZT1zcF9kZXRhaWw


My stems were clearance from Magnolia. They are large, with these smaller guys, you may want to use more than one stem in a bunch to achieve the same fullness. This link provides these stems in a multi pack, so that helps. I use them on the opposite side of the garland bells, to help balance the weight and color of the other side of the mantel. You could omit if you want a lighter feel.

Poster frame (18x24)
https://smile.amazon.com/Lorell-Stylish-Poster-Frame-49213/dp/B07K6TYK93/ref=sr_1_4?crid=2SJG2ARURVK6Z&keywords=poster+frames+18+x+24&qid=1668804614&s=home-garden&sprefix=poster+frame%2Cgarden%2C98&sr=1-4


Here are the frames. Both linked art work are 18x24 so you could easily order 2 frames for the price of 1 regular picture frame. Poster frames also come with plexiglass instead of real glass. Making shipping easier and also storage easier for later. No fear of broken glass. These frames are black. If you want to make gold like my picture, use Rub'n Buff. Link below.

Fairy Lights w/ timer
https://smile.amazon.com/dp/B0778DYH9T?psc=1&ref=ppx_yo2ov_dt_b_product_details


Fairy lights. The true key to Christmas magic. I used these tucked into the garland on the frame. These operate with 3 AA batteries. Most importantly, they have a timer function. Along with the flameless tapers, all lights should be set to turn on and off by themselves. No fuss.

Rub'n Buff
https://smile.amazon.com/AMACO-Metallic-Finish-Antique-0-5-Fluid/dp/B00081HYDM/ref=sr_1_1?crid=1T33BSV85L11M&keywords=rub+and+buff+antique+gold&qid=1668804713&s=home-garden&sprefix=rub+and+buff%2Cgarden%2C101&sr=1-1


This little guy is awesome. I have used it on so many things. I highly recommend you pick up some. They also stock this in store at Hobby Lobby. I can use this and make sure my metals blend together effortlessly. You simply squeeze out a bit and rub it in with a paper towel. You could use a paint brush, but this is wax-based, so it will not wash out with soap water...that being said, you may want to avoid getting on hands and clothes for the same reason.

I hope this post helps make it easier to put together a very similar mantel of your own. I will say this is all based on my mantel from last Christmas. I do plan on setting up the same way this year, I just haven't done it yet. Those of you starting to decorate can hopefully order items and get them setup before December 1st! 


Monday, March 4, 2019

The Faux Leaded Glass Window

My latest project deserves a post. Not because it was overly amazing, but it's a DIY that you can do too!

Love the look of vintage leaded glass windows? Well, you can put a custom leaded glass window look in your house for a fraction of the cost of the real thing.

The hardest thing about this project is deciding on a design that works for your space and style. The window I wanted to "makeover" was my window in my stairwell. I put in interior wood shutters, which I love, but I still wanted something interesting without overpowering the small area. I decided on making my own faux leaded window with no stained glass coloring. I previously made one of these for a window we didn't end up using, so this is my "take two."

My window is 56x32", so not a small accent window, but a substantial focal window. The thing that needed the most planning was factoring in the size. Hobby Lobby sells all you need, but the thin plexi glass sheets do not come large enough. In fact, I needed 3 of their largest size ($6.99 each before coupon) to fill up my window. With that came strategic design plans and making a pattern that disguised the seams. Here is what I came up with:


I did end up tweaking it a bit more after this template to account for the window plastic frame it would sit on top of. Yes, this window will be attached to the existing window with the ability to take it off later with no damage to your house's actual window. Drawing this design was fun and a bit of a challenge, if it seems too daunting for you, I suggest simply searching online for a design already made and copy it, altering it to your size needs. After your template is set, cut your plexi glass sheets to sizes that meet your measurements. In my case I used 1 24x32 sheet and 2 16x32 sheets on top and bottom to fill up the space evenly...that's why there are solid black lines that stretch from one end to the other about a 1/3 up and down from the edges; to hide the seams. I'll highlight them so you can better visualize.


  I then picked up liquid leading, faux lead strips, and different clear glass application paint. Etching, crystal clear, and frosted. I also planned to apply each of these in different ways to ensure a patchwork look of different glasses. You can get a ton of different colors with this brand as well, but again, for this project, I wanted no color. I also had some spare glass vase filler beads and added those in for texture and another glass element.


I cut and planned and measured a ton, and then, you just have to go for it! As it is, this stuff is not expensive, and it's not on anything permanent. So, don't worry! The worst case scenario is just tossing it in the trash and nothing changes.

I mentioned applying the different paints in different ways to add style and believability to the piece. I chose a stiff paint brush for horizontal strokes, a foam sponge brush for dabbing (leaving bubbles), and using the tip of the paint nozzle in circular motions for "swirls."


Here is a picture of the paint still drying and curing, so it appears white until fully dry. You can also see the glass bead vase filler placed with heavy duty glue dots. I used a lot of the faux leaded lines on the long straight runs, for obvious reasons. I did run out of strips, so some of the lines are the liquid leading. All the swirls, circles, leaves, and petal-type designs are done with the liquid leading.  The trick is holding the nozzle off the surface and go slow, letting the liquid slowly lay evenly down on the plexi glass. (Remember to take off the plastic protective covering on the plexi glass first!) I had my template underneath the plexi glass, so it was simply "tracing" over the design.


Here is  the center panel with no fancy design, just the line work, making sure my strips align up against the edges where the other panels will connect...making that seam "disappear." You can also see the protective plastic film on the underside of the plexi glass. I suggest keeping that there until you hang it up. No sense in exposing it to scuffs and scratches early on. I say this, and yet, I still ended up with some scratches...I don't know how.

I installed each section with just a generous dap of hot glue in the corners on the plastic window trim of the existing window. I did struggle a bit between keeping the lines straight, and keeping them fluid from one section to the other. It's not perfect, but it's pretty darn close. It looks how I envisioned it and I am glad I did all the work. It was a weekend project, from Friday evening to Sunday evening. I did stop for long periods of time (i.e. eating, soccer games, dry time) but it will take some planning and patience...maybe less if your window is smaller and/or your pattern is simpler.


I apologize for the poor pictures. This stairwell is impossible to photograph, and believe me, I have tried! I still feel you can appreciate the window in them though, so that's all that matters. You can clearly see some scratches in the middle panel. The one I spent the least amount of time fussing with. You couldn't even see them until I peeled off the plastic sheet while hanging them up. I certainly wasn't going to stop and redo it right then, so we are calling it character for now. Roll with it. ;-)

Total cost of this DIY: ~$35 (always use that 40% coupon at Hobby Lobby!)

Thursday, January 31, 2019

Quilted Wood Wall Art

New year freshen up continues with a small project. My little hall that leads from the front part of the house to the back part is a fun place to decorate. My goal is to choose some unexpected and interesting wall decor, and for awhile it was the place of my first tobacco baskets. The thing is, it's a narrow hall, and baskets stick out a fair amount. After about the 9th time of picking up my baskets and fixing them back on the wall, I got to thinking..."What else can I put here?" What I came up with something I could not find, so therefore, I need to make it.

I envisioned a set of 2 wall hangings of pieces of wood, patterned to make a wood-quilt-like design. I had pretty specific dimensions in mind, so when I found nearly an exact match, I grabbed it...actually, I added it to my online cart and received it at my front door a couple days later. Here are my 2 blank frame wall signs:

Smaller sign


Larger sign


Then I ordered boxes and boxes of pre-cut geometric wood shapes.

Hexagons


Triangles


and Diamonds


I then arranged the shapes on my blank frames to my preferred pattern and had to figure out a color scheme.


I had to use the computer to help plan out a color layout...this is the 3rd attempt and the one I went with
Wood glue, time, and patience; and I got all the pieces on the board. I do wonder if I should have put the color on first, but I really needed to gauge the size of the pattern and the number of pieces I needed before coloring, and once I got them all on and centered, I did not want to dump them all off. I did color them with watered down acrylic paints. This way, the wood texture and tones were still visible through the color, giving it a more stained-wood look over a painted-wood look. I was very pleased with the results.


I recommend this craft project, but it will require some creativity and some patience (not to mention some money for all those shapes!) The smaller the frame and bigger the pieces, the faster and cheaper the project. It's a great look and is completely custom and unique to your house. My favorite kind of decor.

-M.Lewis (IG @Designontheside)

Friday, July 13, 2018

The Silhouette Project (A Look Back)

A revisit to one of my favorite projects! The Trio of Silhouettes! CLICK HERE for the original post!


The tobacco baskets are very popular at Hobby Lobby, and the other items I either had around the house, or I ordered from Amazon!

M. LEWIS

Sunday, May 20, 2018

Faux Potted Lemon Trees

Summer is almost here (in Texas, it's already here) and I felt it was time to put away my pastel blossoms and bird decorations and go with a more summer theme. The issue for me is I am not a huge fan of summer decor. I do like my red, white, and blue around Memorial Day and 4th of July, but other than that...nothing really grabs me. I am not into beachy, nautical themes, I don't like bright colors, and when I'm all sweaty and irritable by mid July, I don't like "too much visual stimuli." So...what to do?

Last year I did something radical. I embraced a difficult color for me, yellow. I saw all these summery, lemon-centered decor pictures, and you know what? I didn't hate it...I actually really liked it. It was of course seasonally appropriate, and it was organic and simple. So, I got myself some lemons.

Centerpiece on kitchen table, Summer 2017


This year, I decided to take it a bit further...lemon trees.

I love my faux potted olive trees I made a while ago, and I was a bit bummed about putting them away (their color didn't seem fitting for summer) so, why not do my DIY project all over again, this time adding lemons.

Project items assembled.


All pieces from Hobby Lobby. 2 ceramic pots, river stone vase filler, brown floral stem tape, 2 sprigs of green tree leaves, 2 wooden dowels, 2 floral foam discs, and a bag of small faux lemons. Total: $38 for all supplies.

I disassembled the leaves and attached them to the wooden dowels, cut to desired size. I wrapped the leaves in floral stem tape and continued to cover the rest of the dowel. I placed the leaved dowel in the floral foam, already hot-glued into the pot, and I filled with rocks. I attached lemons with floral wire (already on-hand) and covered with floral tape. I secured the rocks in the pot with clear-drying glue.

Taller lemon tree

Smaller lemon tree

The pair side by side

I took down the previously placed olive trees and replaced them with my new lemon trees.

Family room fireplace mantle


I'm going to be honest, it's a lot of yellow for me. Maybe it's just the transition from a muted mantlescape, but I'm getting used to that bright color up there. I do very much enjoy them, and I'm so pleased with how they turned out. Each tree comes out to about $19 a piece.

In a few days I will add some patriotic flare for Memorial Day and then add again for 4th of July. I think this set up will work nicely for this year's summer months!


M.LEWIS


Friday, May 11, 2018

Exposed Brick Wall (part 2)

As I mentioned in my previous post, I needed to order more of the brick wallpaper to finish my dining room project. I received the second order of wallpaper and finished the wall in the dining room with much leftover. I had an idea of where to put it, and tonight, I found a bit of time to squeeze in the application.

The atrium area above my front door was my chosen place, and I think it turned out quite well.

Here is what the atrium looked like a about a month ago:


I got the lights changed out a few weeks ago, and now the wall:


I finished right as the sun went down, so tomorrow I plan to take more pictures in daylight. However, right now, I am very pleased!


M.LEWIS

Monday, May 7, 2018

Exposed Brick Wall

I have been planning and brainstorming different ways to add character and charm into my house. It's been a few years and my kids are getting older, so I am able to find these pockets of time to design and execute my ideas.
My latest project is finding the perfect place for an exposed brick wall. I have always loved them and have wanted one...but where?

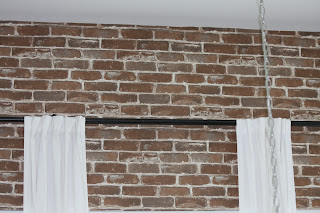
My dining room was lacking in personality and texture, so I decided that was a good room for my idea. I wanted to make the process swift and without a lot of money and material. Enter: wallpaper. I know, I know...wallpaper? Really? But yes, it's totally worth it. I recommend using heavy tape and straight pins to hang until you know you really love the look.

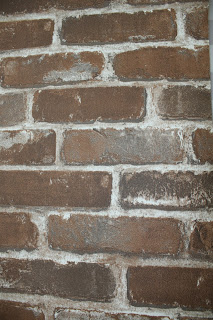
I ordered a 3D, textured wallpaper in my preferred brick color. You can order what I picked HERE. It's listed as "brown" but it is really a mix of brown and gray.


The results are amazing! I am so pleased with how the room turned out...I still have to finish up the bottom of the wall, but I ran out of wallpaper. An order for more wallpaper was placed tonight, by the end of the week it should be complete. I will have a lot left over, so I am already planning on putting just a bit more up in another place.

BEFORE:::


AFTER:::


Total for this project: $68 (with lots of wallpaper to spare)


M.LEWIS