Wednesday, February 28, 2018

Faux Potted Olive Trees

Another look for less!

This project: Faux Potted Olive Trees

I love the look and I have been casually hunting for some in my price range. I haven't gotten very far, so I decided to go ahead and make my own.

Here is a good example of a typical potted olive tree and its price:

$40.97 19.5in
LINK HERE

Not terrible, but still, $40+ dollars for a plastic baby tree? I bet I can do better. ;-)

I bought in "bulk" so I could make at least 4 trees. (3 "little" (~22in) and 1 "big" (~28in))

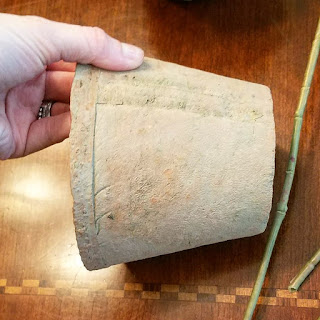
The parts, disassembled
LINK for floral foam

Olive branches LINK

Pots purchased last season, but any container will work fine. I also used these pots...LINK

Moss LINK

Olive branches (5): $30
Pots: $15
Moss: $8
Foam: $8

(I could have found even better deals by visiting Hobby Lobby, but I wanted the convenience of shopping online and delivery to house.)

Total $ spent: $60
$ per small (~22in) tree: ~$13.50
$ per big (~28in) tree: ~$17

(with material left over)

The building process was pretty simple and quick...even with my helpers. ;-)

Floral foam in a pot, "big" tree uses 2 branches, dowels for support, tape

Covered dowels and tape with wood printed contacted paper. I already had on hand, but you can buy here...LINK I then cut out a cardboard disk to fit in the pot, then glued in moss.

Not the best quality picture, but here they are, adding the perfect touch to my mantle.

I LOVE them, and I can't believe I didn't do this sooner. "Little" tree (~22in) on the left, and "big" tree (~28in) on the right.

Completely worth the money and very pretty. I have 2 more not pictured. They reside on the corner of my master bath. The look for less is a win!


M.LEWIS

Wednesday, August 16, 2017

Pause

I have decided to suspend "Inspiration Monday" for a little while. Please follow any of the designers I have posted in the past for a constant stream of decor and style inspiration!

Monday, July 24, 2017

Inspiration Monday

One of my favorite designers to follow is @cottonstem. She is lovely inside and out, her designs are creative, out-of-the-box, and beautiful. Follow and you will not be disappointed!


M.LEWIS

Monday, July 17, 2017

Inspiration Monday

I view this picture with a cool breeze and zero bugs. Realistic, right? Still pretty and relaxing. I look forward to the mountains in September!


M.LEWIS

Monday, July 10, 2017

Inspiration Monday

I was in love with this rustic gallery the second I saw it. Inspiration Monday win! Follow @rustedbliss and enjoy!


M.LEWIS

Monday, July 3, 2017

Inspiration Monday

Monday, Monday; inspiration time...independence style!


@thislittlehomeofours gets 4th of July style right with this porch setup. I love it! Happy Independence day (tomorrow)! ;-) :-D


M.LEWIS

Monday, June 26, 2017

Inspiration Monday

How relaxing is this? I love the firepit, stump stools, adirondack chairs...of course I'm sure it's a pleasant 83' and no bugs. ;-) Follow @countrylivingmag here.


M.LEWIS

Monday, June 19, 2017

Inspiration Monday

This week I want to spotlight @desertdecor. Her outdoor space is simple, airy, and inviting. It screams summer, in the best way.


M.LEWIS

Monday, June 12, 2017

Inspiration Monday

Monday again! Time for some inspiration!

I was scrolling in my instagram feed and stopped in my tracks at this picture. I followed the source, and behold, my new favorite account, @yellowprairieinteriors. All of her pictures are a dream. I love her style and her house!


M.LEWIS

Monday, June 5, 2017

Inspiration Monday

Inspiration Monday!

How pretty and cozy is this?! Weathered wood and light sage plants...great combination.


Follow @rustedbliss for more rustic beauties!


M.LEWIS

Friday, June 2, 2017

Guest Room Complete

Just a follow up on my mini guest room project...

Thanks to Amazon Prime and fast Hobby Lobby shipping, I was able to set up my new guest room items this morning while the baby boy napped.

Here are some (pretty pathetic) before and after photos:


Before

After

Changed the bedding and bed tray flowers...also kicked out the dog bed.

Before

After
Bedding change, and clean off my desk and got rid of the boxes in the corner.

Before

After

Cleared off the shelves and put up more appropriate items...instead of stuff I just had laying around.

While it's a bad picture, the best part of this room is the bay window looking out onto the neighborhood green space

Here is one more picture of the items I bought and placed (minus the behind the door hooks, though I did install those as well) :::

"Blessed" sign, plant trio, book safes, framed house info make the shelves look purposeful and finished, not junky and silly.

Not a big change, but it didn't need one. I am pleased with this mini redecorate project! All items purchased for this project can be found HERE.


M.LEWIS